Getting Started
Installation
Introduction
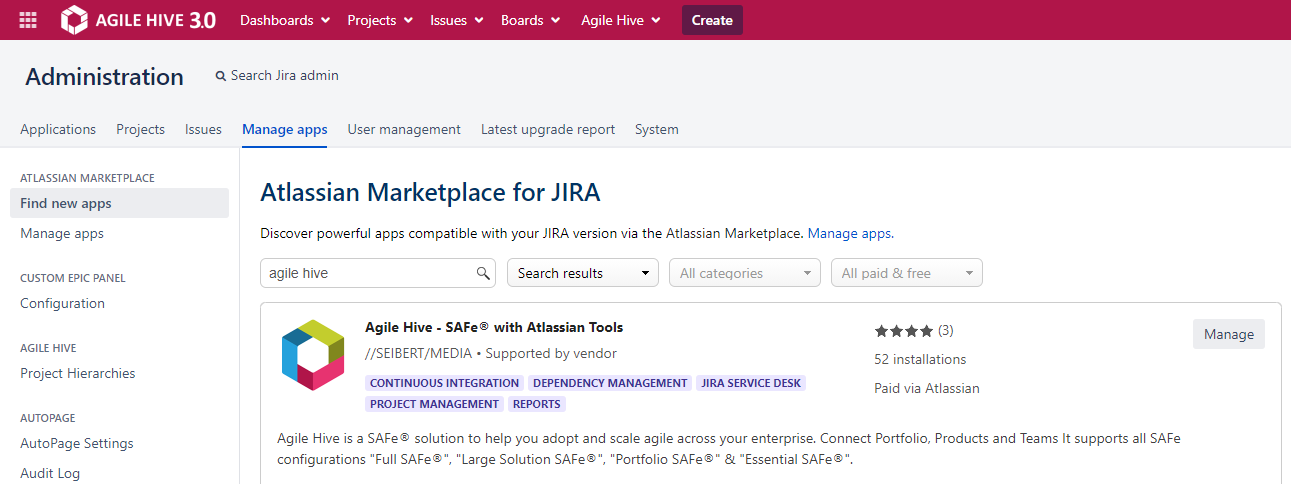
Agile Hive is a Jira app and available on the Atlassian Marketplace. Please install Agile Hive in your Jira environment:
Go to 'Administration → Find new apps'. Enter Agile Hive in the search field and hit enter. Click the 'Free Trial' button and accept the installation in the dialog.
Next step
Project Creation
Introduction
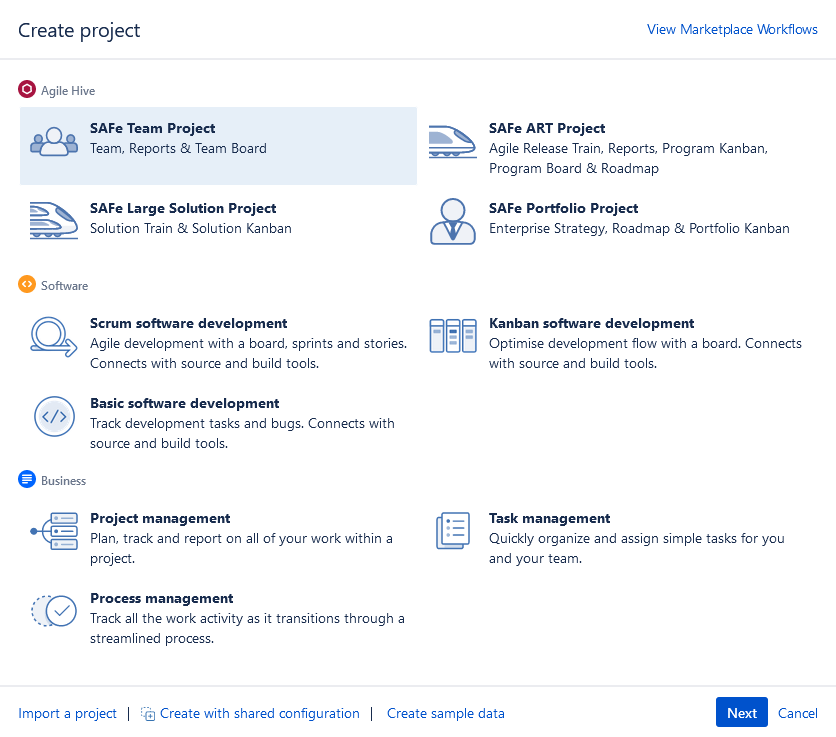
Agile Hive provides preconfigured projects for all four SAFe levels. Easily create a project for every Team, Agile Release Train, Solution and Portfolio with the corresponding template.
Go to 'Projects → Create Project' and select the desired project template.
Matching boards are also created automatically by Agile Hive. Of course, you can adapt the project configuration to your wishes.
Example - Creating an Essential SAFe (Agile Release Train + Teams)
» Creating the Agile Release Train project
- Go to 'Projects → Create Project' and select the 'SAFe ART Project' template.
- The 'SAFe ART Project' appears and shows which issue types and which main workflow are used. Simply click 'Select'.
- Enter a project name. Optionally adjust the project key and the project lead.
- Repeat those steps for all your Agile Release Trains.
» Creating the Team projects
- Go to 'Projects → Create Project' and select the 'SAFe Team Project' template.
- The 'SAFe Team Project' appears and shows which issue types and which main workflow are used. Simply click 'Select'.
- Enter a project name. Optionally adjust the project key and the project lead.
- Repeat those steps for all your Teams.
Next step
Project Hierarchy
Introduction
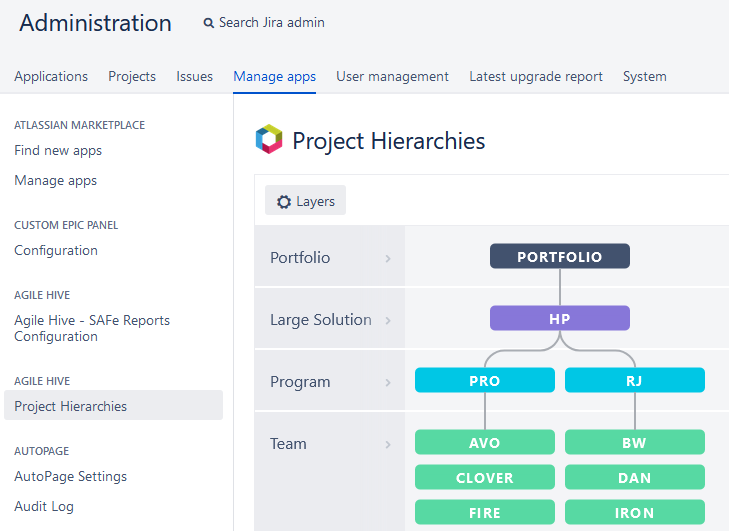
With the help of the Agile Hive Project Hierarchies, you can map the four SAFe levels (Portfolio, Large Solution, ART and Team) as well as the business units located therein.
The SAFe levels are represented as horizontal layers. The business units are shown as colored diamonds within the layers.
Go to 'Administration → Manage Apps → Project Hierarchies' to More Details
Example - Creating an Essential SAFe Project Hierarchy (Agile Release Train + Teams
» Creating the SAFe Layers
- If you have no layers yet, you will be prompted to: “Click here to add your first Layer”
- Create the first Layer and name it "Program" or "ART". In the column "SAFe level" please select "Program" from the dropdown.
- Create the second Layer and name it "Team". In the column "SAFe level" please select "Team" from the dropdown.
- Close the "Confirgure Layer" dialog
» Maping the SAFe Projects
- Click on the grey Layer "Program" (on the right side an area will slide open, showing the name of the layer and a Drop-Down menu titled Projects)
- Clicking on the drop-down, a list of all Jira projects is displayed. By typing a name or a key of a specific project, you filter the results.
- Choose a project. It will be displayed in a list under the drop-down, labeled “New”. This indicates, that this project will be assigned to the layer once you press Save.
- Repeat this process for the Layer "Team" until all teams are inserted and visible inside the view
» Relating the SAFe Projects
Select a project within the "Program" Layer in the hierarchy view. In the sidebar is a drop-down titled "Child Projects".
Clicking on the drop-down, a list of all Jira projects is displayed. By typing a name or a key of a specific project, you filter the results. Choose a "Team" project.
Repeat step 3 until all "Team" projects are inserted & finally press Save. The selected "Program" should now be connected to the first "Team" project with a grey line.
Next step
Final Touches
Introduction
In the final step we enable drag'n'drop linking in boards and the automated documentation.
Enable Drag'n'Drop Linking in Boards
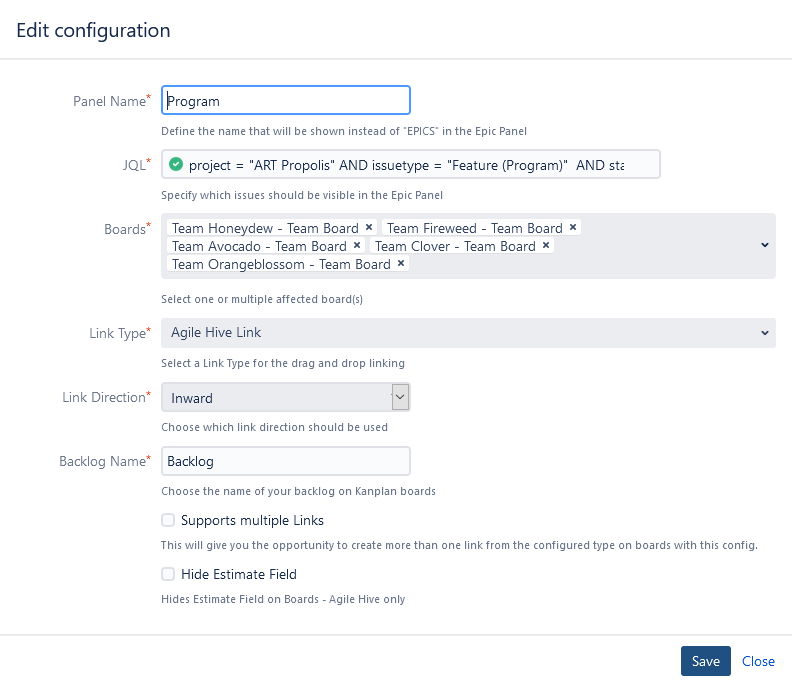
Go to 'Administration → Manage Apps → Custom Epic Panel → Configuration' to configure the behaviour of Epic Panels in selected Jira Boards.
Example for all Teams of one ART
- Click on "Create new configuration"
- Enter as Panel Name "Program"
- Enter as JQL: project = "Your Project" AND statusCategory != Done
- Provide all Team Boards of the specified ART
- Set the Link Type to "Agile Hive Link"
- Set the Link Direction to "Inward"
- Enter as Backlog Name "Backlog"
- Press Save
Enable Automated Documentation
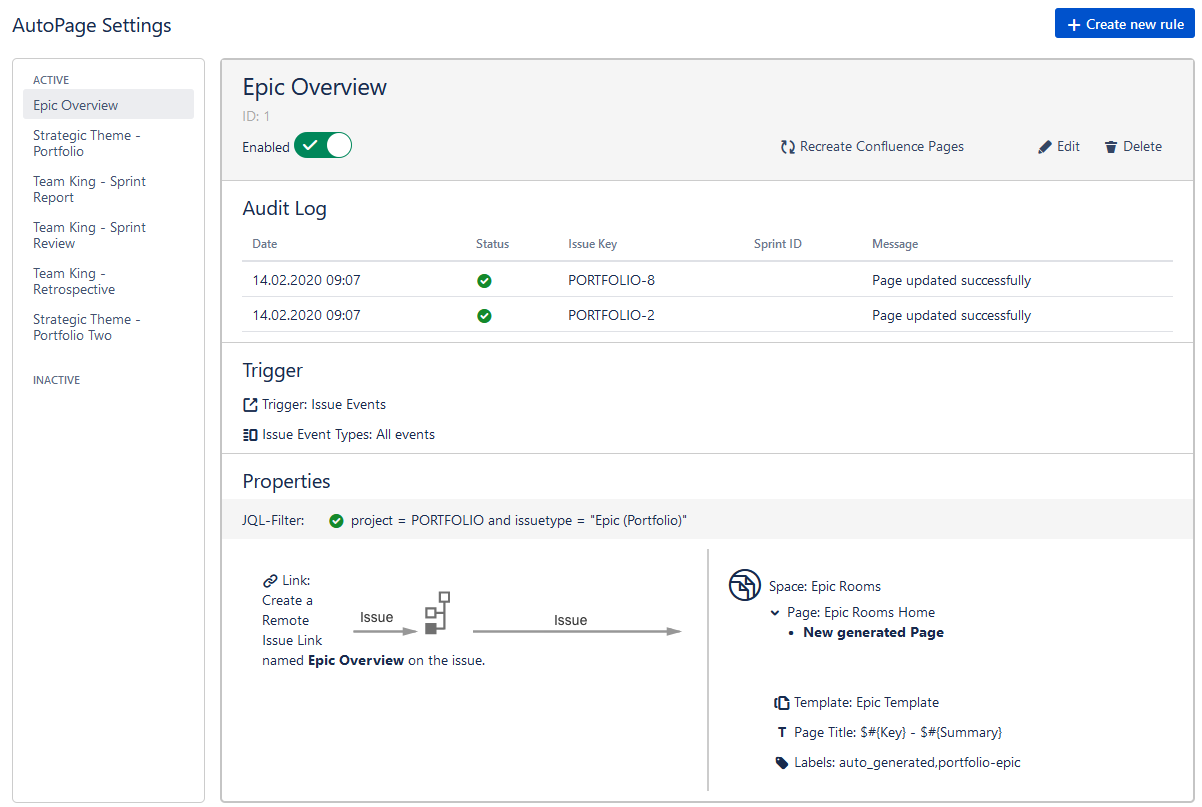
Go to 'Administration → Manage Apps → AutoPage → AutoPage Settings' to configure when Confluence pages should be created, linked & updated automatically through Jira.
Example for automated documentation of Epics
- Click on "Create new rule"
- Rule: As rule name enter "Epic Overview"
- Issue Event Types: Select as Issue Event Types "all events"
- JQL: Provide the following JQL: project = "Your Project" and issuetype = "Your Issue Type for Epics"
- Confluence Space: Provide the Confluence Space where the page should be created
- Confluence Template Page: Provide a Confluence Page, that will be used as a template
- Confluence Page: Choose a Confluence page as parent page
- Issue Link Name: Enter "Epic Overview"
- Press Save